MP4 Usage Guide
Original Page URL: https://www.digital-digest.com/articles/MP4_Usage_Guide_page1.html
Author/Publisher: DVDGuy
Date Added: Oct 14, 2006
Date Updated: Oct 14, 2006
This guide provides information and tips for some of the things you might need to do with your MP4 file, like playback, conversion (to and from), splitting/joining, mux/demux and more.
This guide is split into several independent sections, each dealing with an aspect of MP4 usage. You can now select one of the sections from the table of contents below:
Table of Contents:
- MP4 Playback
- MP4 Conversion - conversion to other formats
- MP4 Encoding - conversion from other format
- MP4 Manipulation - using YAMB (mux/demux, split, join)
MP4 Playback:
The next few paragraphs explain what MP4 playback is all about, and is recommended that you read this section if you've never played around with MP4 files before. For those that are impatient, skip to the sample instructions below for precise steps on how to playback MP4 files encoded with H.264/DivX/XviD and MP4/AAC audio.
MP4 is a container format. What this means is that, like the AVI format, MP4 files can include a video track encoded in various formats (codecs). It can also include multiple audio tracks (also supporting various codecs) and also subtitle and even chapter information. As such, there is no single method for playing back all MP4 files, since the playback is totally dependent on which codec the file is encoded with.
However, the MP4 container is most commonly used with MPEG-4 SP/ASP (available in variety of forms, including DivX, XviD) and AVC (H.264) video, with MP3, AC3 or AAC audio. AVI is still the most popular container format for forms of MPEG-4 ASP (with MP3 audio), and so most recent MP4 files you download will be H.264 with AAC audio thrown in for good measure (AAC is more compressible than MP3, in the same way AVC/H.264 is more compressible than ASP). In fact, MP4 with H.264 is so common these days, many people simply refer to it as H.264 (or x264, but that's slight misnomer as it refers to a very popular H.264 encoder).
To playback MP4 files under Windows, you'll need several things that makes up a typical Directshow based playback method. You'll first thing you need is a MP4 splitter/parser to separate the MP4 file into its separate audio, video (chapters, subtitles) elements.
The next thing you need a decoder (or decoders) to support whichever codec the video/audio are encoded in. This can usually be easily achieved using an universal decoder like ffdshow (universal because it supports practically every format there is, including DivX/XviD/H.264).
And of course, you'll need a player software which supports the aforementioned splitters and decoders. Again, this is easily available in the form of Media Player Classic, an open source multimedia player.
For those not using Windows, there are alternative software (some also work under Windows) like Apple QuickTime, MPlayer, VideoLAN, xine...
Both the Xbox 360 and PS3 also support MP4/H.264 playback. Guides are available here to show you how to make and play MP4/H.264 files on the Xbox 360 and PS3. In addition to consoles, many other devices such as the Apple TV both support MP4/H.264, and there are one-click encoders specifically available to make compatible files for these devices (see the iPhone and Apple TV links for guides).
Below are sample instructions on how to get MP4 playback happening in Media Player Classic (MPC) and Microsoft's Windows Media Player (WMP_. Assuming you do not have any video codecs installed prior (like DivX or XviD codecs), the method below will support any MP4 file using H.264/DivX/XviD video and MP4/AAC audio.
Installing MPC:- Download the MPC version that is suitable for your operating system
- MPC is really just a single executable, so extract the .exe file to any directory you wish (eg. c:\Program Files\Media Player Classic\)
- Click on the .exe file to start MPC. Easy.
Installing ffdshow:
New Install:
- Download ffdshow and start the installation. Click "Next" until you get to the "Select Components" screen, and make sure you select the "VFW interface" option. Press "Next" to continue.
- When you reach the "Select Additional Tasks" screen, it will now allow you to select which codecs ffdshow will decode for you (if you already have ffdshow installed, the current selected decoders will be shown). Select the "H.264, X264", "XviD" and/or "DivX 5" video options (if you already have the separate XviD and DivX codecs installed, selecting these then becomes optional). Also select the "MP3" and "AAC" options for audio. You may select other options to allow ffdshow to be the decoder for these types of video as well, but that's optional.
- The "Postprocessing" and "Volume normalization" options further down is optional. ffdshow supports a lot of advanced postprocessing filters, such as video sharpening and audio effects. These can be configured later on (see "Existing Install" section below) as well.
- Press "Next" and then "Install" to start the installation. You do not need to run any of the configuration tools when presented with the option, so de-select them and press "Finish" to end the installation.
- Once ffdshow has finished installing, please go to the "Installing Haali Media Splitter" section below".
Existing Install:
- This section is for when you already have ffdshow installed on your system. You can (and probably should) grab the latest version of ffdshow and run the install, which will update your current ffdshow version but keep your current settings. In any case, from the start menu, go to the ffdshow folder and run the "video decoder configuration" program.
- In the "Codecs" section, we will select which decoder is to be used for the listed formats. Make sure the "libavcodec" option is selected for "H.264". If you are using ffdshow to decode DivX/XviD, then select either "libavcodec" or "XviD" (my choice) for the "XviD" and "DivX 5" formats. Press "Apply" and then "OK" to close this program.
- From the start menu folder again, select "Audio decoder configuration". In the "Codecs" section, make sure the "libfaad2" option is selected for "AAC" and "libmad" is selected for "MP3". Press "Apply" and then "OK" to close this program.
- Certain older playback software and some conversion tools also require the VFW (Video For Windows) config to be made (this isn't necessary for this method), and you can do this through the "VFW codec configuration" option again in the ffdshow start menu folder. Go to the "Decoder" section by clicking on the "Decoder" tab at the top, select "Codecs" and just like before, make sure the "H.264", "XviD" and/or "DivX 5" formats have a decoder option selected. Press "Apply" and then "OK" to close this program.
- ffdshow is now configured for H.264/XviD/DivX/MP3/AAC playback.
Installing Haali Media Splitter:- This step is optional for MPC, but required for WMP.
- Download Haali Media Splitter
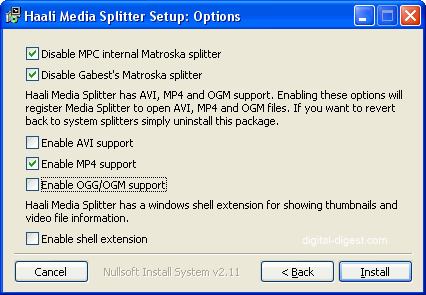
- Run the installer and when you get to the option select step, make sure the "Enable MP4 support" option is selected.
Associating .mp4 files with MPC:- Right click on the ".mp4" you are using for this test. From the menu that opens, select the "Open With -> Choose Program" option, or if it isn't there, select "Open".
- Click on "Browse" and locate your MPC .exe file (eg. c:\Program Files\Media Player Classic\mplayerc.exe). Select the "Always use the selected program ..." option if you want to make the association permanent. Press "OK" to close the window.
MP4 Conversion - conversion to other formats:
This section looks at how to convert a MP4 file to an AVI file or to a DVD.
MP4 to AVI Conversion:
Dr. DivX is an open source tool from DivX.com that supports MP4 to DivX conversion. The output file will be in .divx format, and it can be renamed to .avi afterwards (you may need to turn off the "hide extension for known file types" option within Windows - see image). There is a section in the YouTube to DivX Conversion Guide that shows some instructions on how to convert FLV files to DivX - the instructions are identical for MP4 to DivX conversion (just substitute the "FLV" file with your "MP4" file.

SUPER is another freeware tool that supports MP4 to AVI conversion, and also conversion to many other formats. It's slightly more complicated than Dr. DivX, and you'll need to know about video resolution, framerate, bitrate and some other attributes of video conversion. The actual usage is fairly intuitive, just select the container format (AVI), codec to use (eg. DivX), audio codec (eg. MP3), output video resolution/framerate/bitrate and output audio properties, drag the original MP4 file into the file list and start encoding.
SUPER is MEncoder based. MEncoder (part of the MPlayer package) is a multi-platform (Windows, Mac OS X, Linux Red Hat / Fedora binaries available) encoding tool. You can use MEncoder separately to convert MP4 to a variety of formats without using a GUI like SUPER.
For commercial tools, there is Apple QuickTime Pro, but it has limited support for H.264 based MP4 files. There is also Total Video Converter, a trial version is available to download.
MP4 to DVD Conversion:
There are quite a few DVD authoring tools that will support any file format that DirectShow (or in some cases, ffmpeg) supports, so it's very likely that you will be able to convert your MP4/H.264 file to DVD. You can read a roundup of the most popular of these DVD authoring tools. In particular, FAVC, DVD Flick are both worth a try.
Satsuki All2DVD, as the name suggests, can convert a whole bunch of file formats directly to DVD. The output is an ISO image file which can be burned using ImgBurn (included in package). It's fairly straight forward to use and the whole process only requires free software.
The FilmMachine is another MP4 to DVD conversion tool. It should support most MP4 files, but may have trouble with certain ones (like the one I used to test for this guide, which was a MP4 with 720p H.264 video and AAC audio) - generally, if the file plays in QuickTime, then most software will support it.
Commercial options include TMPGEnc XPRESS and Nero Vision (part of the Nero package).
This section looks at how to encode a MP4 from another video format, specifically AVI/DVD to a H.264/AAC based MP4.
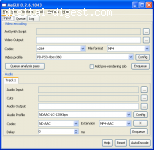
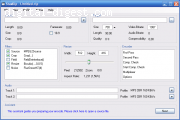
MeGUI and StaxRip are both multi purpose conversion tool that supports the MP4 container format and most forms of video as input (including AVI/DVD/VOB). For H.264 encoding, x264 is used. x264 is considered to be the best free H.264 encoder available at the moment (most of the x264 options are covered in our x264 Options Explained guide). Both MeGUI and StaxRip uses AviSynth, so almost all video formats are support as input, but you don't need to know how to create your own AviSynth scripts as either tools are provided to create the scripts, or the script creation is done automatically for you. For a complete guide on H.264 MP4 encoding, please refer to our MeGUI H.264 Conversion Guide or H.264 Encoding using StaxRip guide. There are also guides that allows you to make Xbox 360 and PS3 compatible MP4/H.264 files.
In addition to consoles, many other devices such as the Apple TV both support MP4/H.264, and there are one-click encoders specifically available to make compatible files for these devices (see the iPhone and Apple TV links for guides).
For commercial options, you can try Nero Recode, which allows easy DVD to MP4 conversion (MP4 is in Nero Digital format, which can either be MPEG-4 ASP or AVC for the video, and LC/HE AAC for the audio).
MP4 Manipulation - using YAMB:
This section shows you how to use YAMB (Yet Another MP4Box GUI) to edit (join, split and (de)multiplex) MP4 files.
First off, download YAMB, install it and run it.
MP4 Splitting:
Go to the "Editing" section and double click on the "Click to split MP4/M4A/MOV/3GP Files" option.
To split a MP4 file, load the MP4 file in the "Input" section and select one of the splitting options:
- Split by Size: Split the MP4 file into smaller files, each with the set file size (and whatever is left over in the final file of the set). Input the file size in MBs.
- Split by Duration: Split the MP4 file into smaller files, each with the set duration. Input in the format hh:mm:ss.ccc or in the number of seconds. The example below splits the video into several files, each 1 minute long.
- Split from Time A to Time B: Split the MP4 file from "Time A" to "Time B". Again, the input in the format hh:mm:ss.ccc or in the number of seconds. The example below produces a file from 1 minute (60 seconds) into the video to 1 minute 20 seconds (80 seconds).
Press the "Next" button to start the splitting process.
MP4 Joining:
Go to the "Editing" section and double click on the "Click to join supported files" option.
To join several MP4 files together, use the "Add" button to add the MP4 files (in the required order), use the "Output" button to specify an output location for the joined file and press the "Join" button to start the join. The "Index" column shows which track in the final output file the current track will be joined to.
Press the "Next" button to start the joining process.
MP4 Multiplexing:
Go to the "Creation" section and double click on the "Click to create an MP4 file with multiple audio, video and subtitle streams" option.
In the "Input" section, use the "Add" button to import the various video, audio and subtitle streams you wish to mux into a single MP4 file. You can use the checkbox to deselect any track that you don't want to add to the output. The "Index" column shows which track in the output file the current track will be added to. If you are adding a .h264 stream, you will have to specify some details for the file, such as the framerate (this is done by selecting the H.264 stream and clicking on the "Properties" button).
Subtitle files can be added, supported formats include SRT, IDX, GPAC Time Text File and QuickTime TeXML.
Chapter files can also be added. The chapter file must be in Ogg text format or GPAC format. If your source is a DVD, DVD Decrypter can create the Ogg text chapter format during ripping (in DVD Decrypter, go to "Settings" -> "IFO mode" -> "Create Additional Files" -> select "Chapter Information - OGG".
Press the "Next" button to multiplex all the input files.
MP4 Demultiplexing/Extracting:
Go to the "Editing" section and double click on the "Click to extract streams from AVI/MP4/MOV/TS" files.
Load the MP4 file you want to demux in the "Input" section. Information about the MP4 file will be displayed in the "Content" section, including a list of available tracks and their properties.
Highlight the track that you want to extract, and then select either the "Extract to Raw Format" or "Extract to MP4" option. The "Extract to Raw Format" option will extract the track in its raw format without a container (eg. .h264, .aac). The "Extract to MP4" option will wrap the extracted track in a MP4 container. You can also use the "Extract All Streams to Raw Format" option, which does exactly what the option suggests.
Press the "Next" button to demux the selected track(s).
|


