
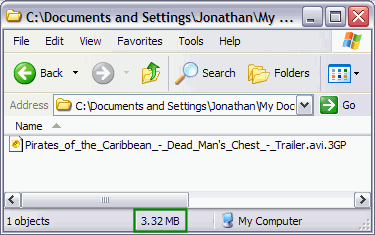
After it is finished, you will have a 3gp file in the "Output Folder" you specified. Transfer the file to your phone and enjoy the video anywhere you go. With the settings I used in this guide, my file was 3.32MB (green). [Screen Shot Below]
Convert any video file to a 3GP file for your mobile phone using SuperOriginal Page URL: https://www.digital-digest.com/articles/any_file_to_3gp_page1.htmlAuthor/Publisher: jmet Date Added: Jun 23, 2006 Date Updated: Jun 23, 2006 Super software is pretty much the only program you would need to do any video converting. Whether you want to convert a soundtrack on a DVD to a compatible file for your phone, encode something for your iPod, or even convert something for your PSP, Super is the only program you need. The acceptable input/output formats are too long to list here but, here are just a few of the many formats it accepts/outputs:
Go ahead and start up Super. [Screen Shot Below] 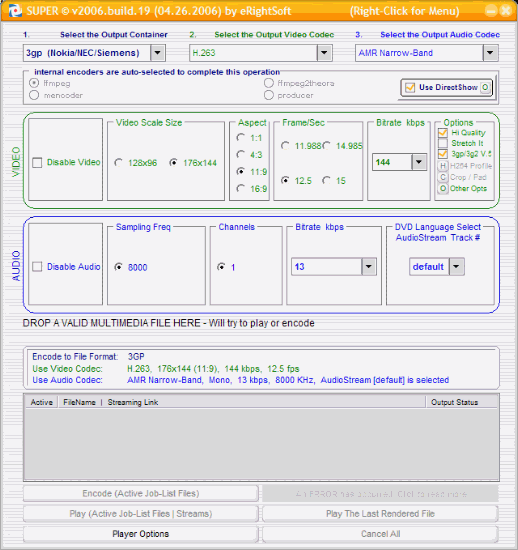 In the first box, go ahead and change it to your phone brand. If you know for sure your phone plays 3gp video files and its not listed. Select "3gp Nokia/NEC/Siemens" (red). It will work for most phones. [Screen Shot Below] 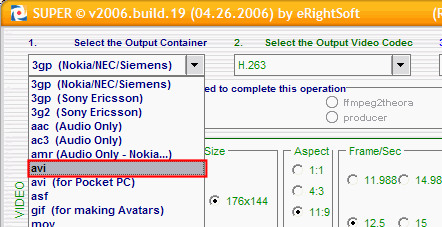 Now lets move to the "Output Video Codec" box and change it to "H.263" (blue). Although, it should automatically set it to that for you when you pick "3gp Nokia/NEC/Siemens". [Screen Shot Below] 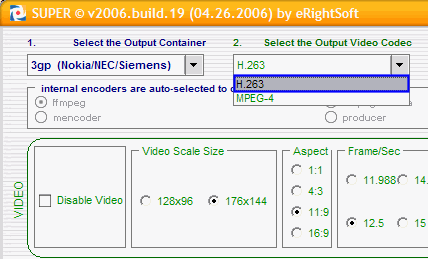 Now onto "Output Audio Codec". Here you want to pick "AMR Narrow-Band" (green). ***Actually you can pick "AMR Narrow-Band" or "AMR Wide-Band", AMR Narrow-Band is compatible with more phones though*** [Screen Shot Below] 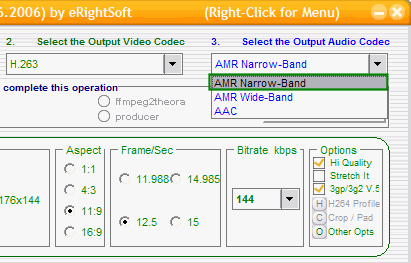 This guide is not specific enough for all phones. You will have to experiment with the settings for different phone types. If you have a newer model phone that you know supports video files, try changing the "Video" codec to "MPEG-4" and the "Audio" codec to "AAC" for better quality. [Screen Shot Below]  Next thing we will look at it is the "Use DirectShow" box (red). Basically with this checked, it allows you to play anything you can play with Windows Media Player. Its a good idea to turn it on (put a check mark in the box) and only turn it off if it causes problems. [Screen Shot Below]  Now lets look at the "Video" settings. Now this will be different for everyone depending on which phone they have and the required specifications. If you can't select your exact resolution, just select the closest one that doesn't go over the limitations (purple). Set the "Aspect" to your liking (gold). Set the "Frame/Sec" to 12.5 (blue). Lets move on to the "Bitrate kbps" box, I recommend anywhere between "128" and "192" (black). [Screen Shot Below] ***The higher the "Bitrate", the better quality you will have, however the file size gets bigger when the "Bitrate" increases. Consult your owners manual to the phone to see its required specs*** 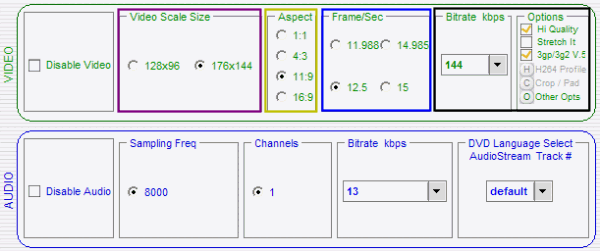 Lets look at the "File" box now (red). This is where you would drag the files you want converted. (You can also right click inside the Super window and then left click "Add Multimedia File(s)" to load the files (blue) [Screen Shot Below]  [Right Click Method Below] 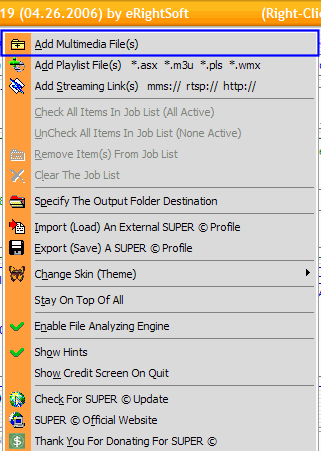 After you have loaded each video file you want to convert its time to set the "Output Folder Destination". Right click in the Super? window and then left click on "Specify The Output Folder Destination" (red). [Screen Shot Below] 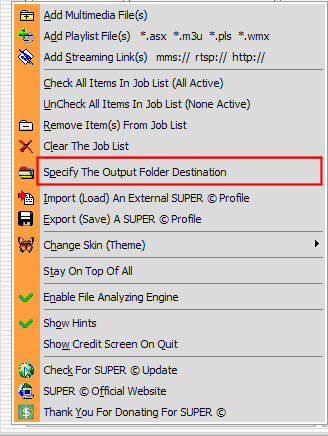 After clicking "Output Folder Destination", the browse for folder window will come up. Here you need to select the folder you want Super to put the files in that it creates (blue). ***I recommend creating a new folder for this, whether it be on your desktop or in your documents*** [Screen Shot Below] 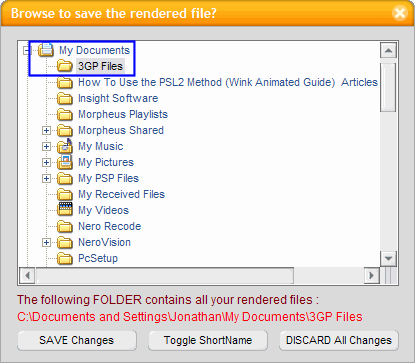 After picking your "Destination Folder", right click again in the Super window and left click "Enable File Analyzing Engine" (green). [Screen Shot Below] 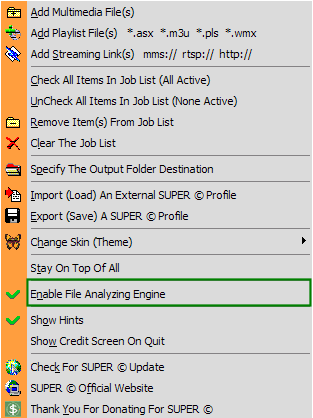 When you are ready, click the "Encode" button (purple). After it finishes, transfer the file to your phone and enjoy the video anywhere you go. [Screen Shot Below]  When you are ready, click the "Encode" button (purple). [Screen Shot Below]  After it is finished, you will have a 3gp file in the "Output Folder" you specified. Transfer the file to your phone and enjoy the video anywhere you go. With the settings I used in this guide, my file was 3.32MB (green). [Screen Shot Below]  |
About Digital Digest | Help | Privacy | Submissions | Sitemap
© Copyright 1999-2025 Digital Digest. Duplication of links or content is strictly prohibited.