Using Nero Burning ROM 6.x/7.x to Burn a DVDOriginal Page URL: https://www.digital-digest.com/articles/nero_burning_rom_burn_dvd_page1.htmlAuthor/Publisher: jmet Date Added: Feb 4, 2006 Date Updated: Feb 4, 2006  This guide covers burning a compliant DVD with the full DVD structure, such as multiple .bup, .ifo, and .vob files using Nero Burning ROM 6.6.0.18 (You may have a older version but, the steps will be generally the same if not exactly). If your burner supports bitsetting, Nero can automatically booktype it to DVD-ROM where it will virtually play on any DVD player. (NOTE: Booktyping is only for DVD+R media. Do not attempt to booktype a DVD-R disc, you will only end up with a ruined disc.) Software you will need: Nero Burning ROM (Part of the Nero 6 Ultra Edition or Nero 7 Ultra Edition package) Go ahead and start up Nero Burning ROM from the start menu, not Nero StartSmart. If your using Windows XP, you would click Start > All Programs > Nero > Nero 6 or 7 Ultra Edition > Nero Burning ROM. As soon as it starts up, the "New Compilation" wizard should start up (red), if it doesn't just click "File", then "New". (Screen Shot Below) 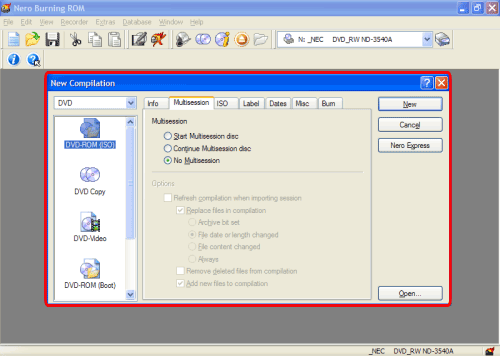
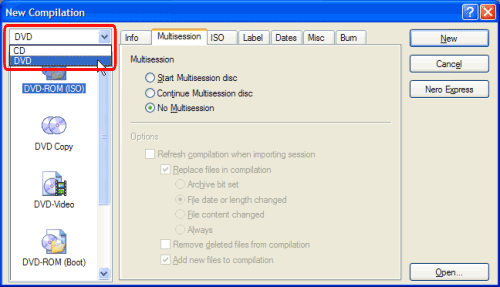
On the top left hand side of the "New Compilation" window, it should say "DVD" in the drop down box. If it doesn't, simply click the down arrow and choose "DVD" from the choices. (There will be only "CD" or "DVD" to choose from). NOTE: If there is no drop down menu, then your version of Nero does not support DVD media. (Screen Shot Below)
 Now on the same left hand side , look below where you selected "DVD" and find the icon that says "DVD-Video" (red) and click it one time. After you clicked it, 6 tabs should now appear near the top of that window (blue). (Screen Shot Below) 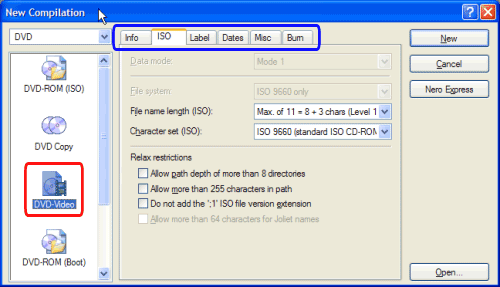
Now lets get all of your settings correct. What I will do is actually post a screen shot of each one of my tabs, so that you can see what settings need to be checked and which ones don't.
The first tab I will be showing you is the "ISO" tab (green). Make sure you select "Max. of 11 = 8 + 3 chars (Level 1)" in the "File name length (ISO):" box (red) and "ISO 9660 (standard ISO CD-ROM) for the "Character set (ISO):" box (blue). (Screen Shot Below) 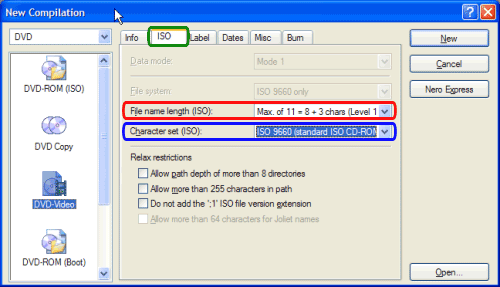 The second tab I will be showing you is the "Label" tab (green). Here is just put the label (name) you want the DVD to have (red). (The "Label" is the name that you see before your drive's letter when you open up the "My Computer" screen.) (Screen Shot Below) 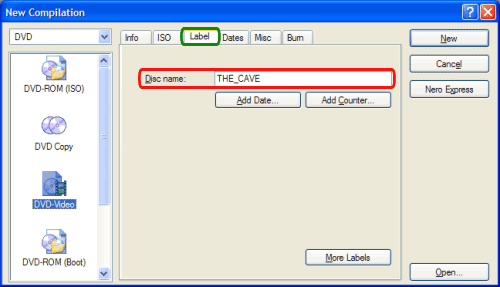
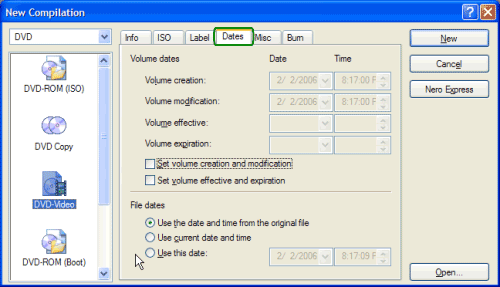
The third tab I will be showing is the "Dates" tab (green). There really isn't anything to change here, so I recommend just leave it the way it is. (Screen Shot Below)
 The fourth tab I will be showing is the "Misc" tab (green). Make sure both boxes have a check mark in them (red) and the number 64 is in the "cache files smaller than" input box (blue). (Screen Shot Below) 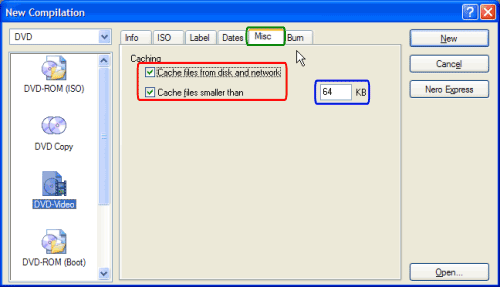
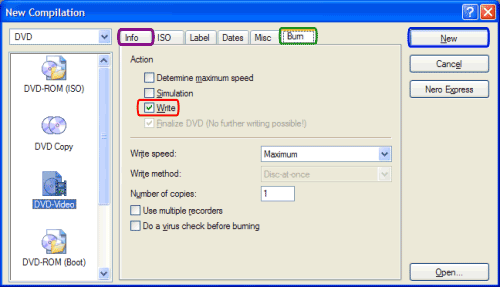
The fifth tab I will be showing you is the "Burn" tab (green). Only thing you need to do here is put a check mark in the "Write" box (red). Note: It doesn't matter what speed you select for "Write Speed:" cause it resets itself after you hit "New" and you have a chance later to set it again. So go ahead and click the "New" button (blue). **I skipped the "Info" tab (purple) as it shows the same type of information every time and is different for everyone.** (Screen Shot Below)
 After clicking the "New" button, you will be presented with this screen. (Screen Shot Below) 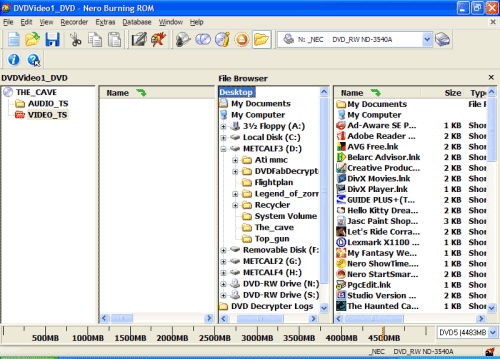
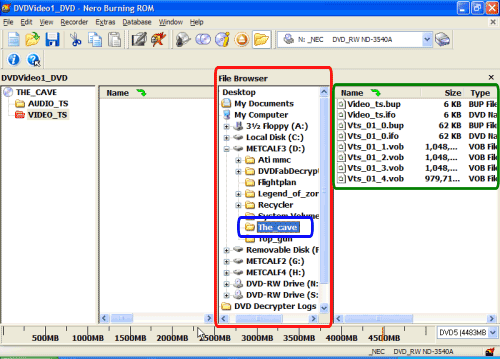
Now in the file browser window (red), navigate to where your files are for the movie you wish to burn (blue). After clicking the folder of your choice, the files located in that folder (which are the files you want to burn) will appear on the right hand side of that screen (green). (Screen Shot Below)
 Now, right click on the first file on the right hand side, then left click on "Select All" (red). (Screen Shot Below) 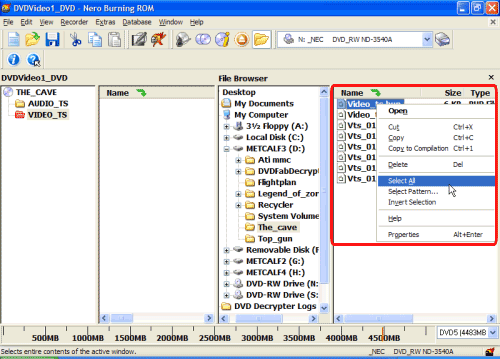
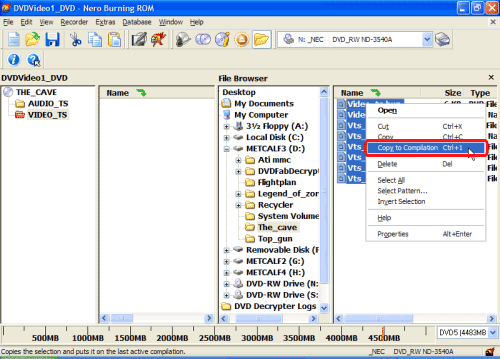
After clicking "Select All", they will all be highlighted. While they are all highlighted, right click on the first file again and left click on "Copy to Compilation" or press "Ctrl+1". (red). (Be careful not to deselect them, they should all be highted still even after you right click them.) (Screen Shot Below)
 Now they should all be on the left hand (red) side as well as the right hand side (blue). (Screen Shot Below) 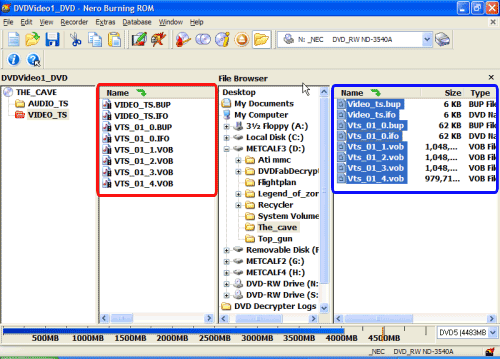
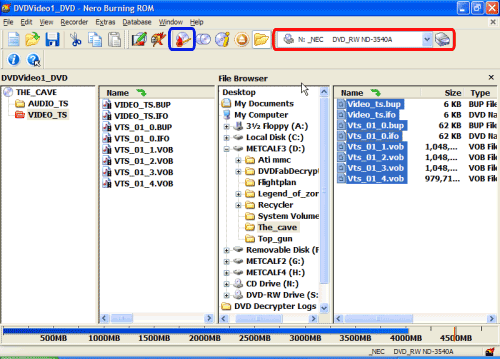
Your ready to burn, so go ahead and stick in the blank disc you are burning to and select the appropriate drive with the disc in it (red). Now click the burn icon (blue). (Screen Shot Below)
 Now this screen will pop up. You have already set the settings for the other tabs when we first started, so the only thing now is setting the burn speed (red) for the burn tab (green). I highly recommend you burn no faster than 8X but, recommend 4X as the safest speed. (Burning to fast may cause it to skip, freeze, stutter, or pixelate during playback) Now, click the "Burn" button (blue) (Screen Shot Below) 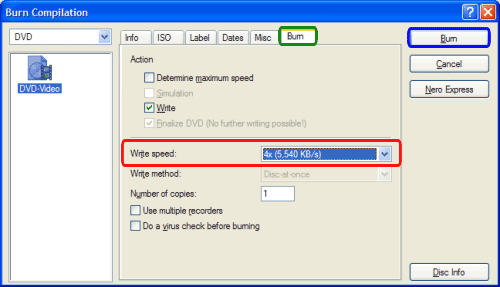
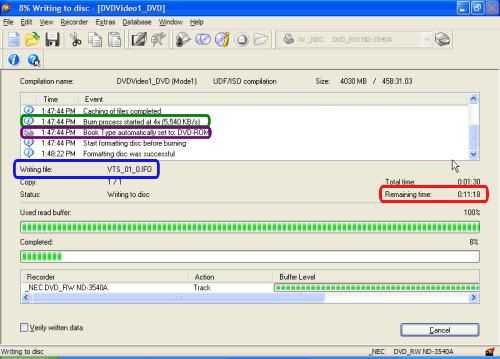
On the burn screen, it shows you all kinds of detailed information.
 When its done, this screen will come up. Go watch your DVD! (Screen Shot Below) 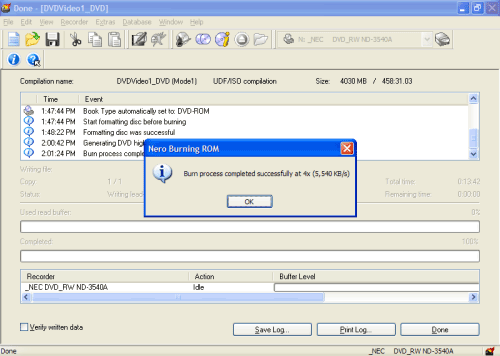
|