Using Nero Burning ROM 6.x - Burning a DVDOriginal Page URL: https://www.dvdr-digest.com/articles/43_1.htmlAuthor/Publisher: jmet Date Added: Jan 6, 2006 Date Updated: Jan 6, 2006 Software you will need:
Nero Burning ROM Now the version of Nero I was using when I made this guide is a older version, so it may look different from your version but, the general steps are the same. Please don't be confused if my screen shots look different from what you have. Its too much work to re-do a guide everytime a new version comes out. Good Luck! 1. First start up Nero. 2. After Nero starts up, you should have the main Nero screen in the background (red), and the "New Compilation" in the front (blue) . (If you don't, just click "File" then "New".) (Screen Shot Below) 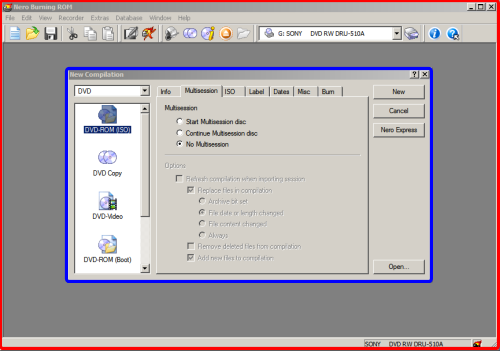 3. On the top left hand side of the "New Compilation" window, it should say "DVD" in the drop down box. If it doesn't, simply click the down arrow and choose "DVD" from the choices (red). (Will be only "CD" or "DVD"). (Screen Shot Below) 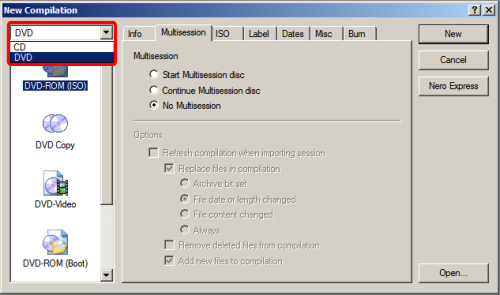 4. Next on the left hand side, under the drop down box you selected "DVD" or "CD", there will be some different icons to choose from. You want to click "DVD-Video" (red) . (Screen Shot Below) 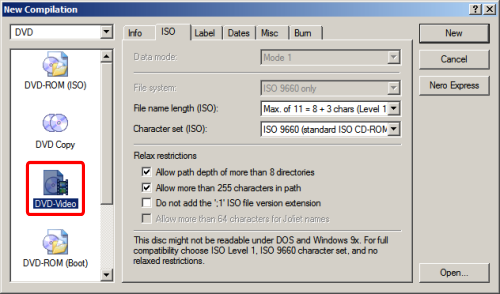 5. After clicking "DVD-Video", 6 tabs should appear at the top of the "New Compilation" window. (Screen Shot Below) 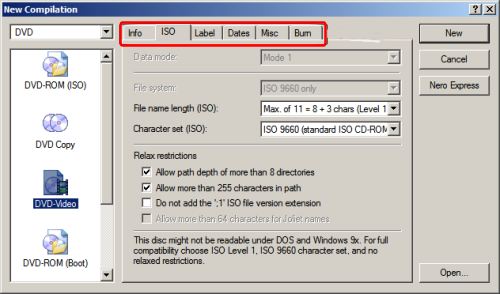 6. Now, I am going to take a screen shot of each one of my tabs just to show you what I have with a check mark in it, etc. I am going to skip the first tab, cause its just a info tab, as it will show different info for everyone. (Screen Shot Below)
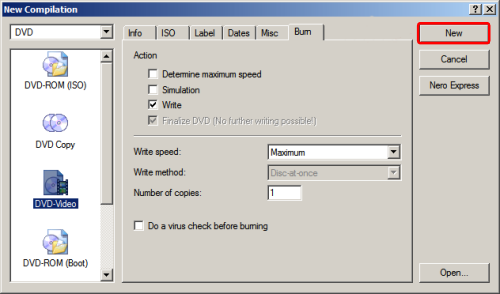
(a) "ISO" tab: Screen Shot Below: The options under "Relax restrictions" can be unselected, because if the DVD files you are burning has been formatted properly (and it should have been), then it won't break these restrictions anyway. 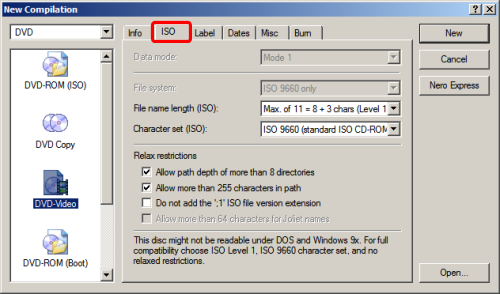 (b) "Label" tab: This is where you would put the movie title. (In some earlier versions of Nero, it does not accept spaces in the words so you have to use the underscore ( _ ) character instead. You can use the "Add Date" and "Add Counter" buttons to add formatted dates/counters, but it's more of a cosmetic thing. (Screen Shot Below) 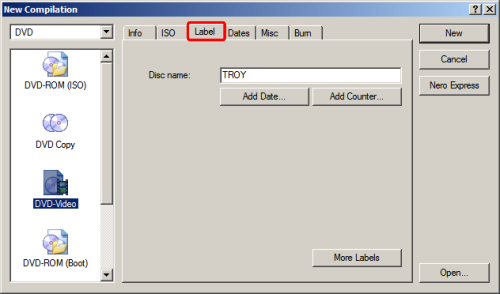 (c) "Dates" tab: You almost never have to deal with the settings here, especially for a DVD video disc. You can just leave this one alone and go to the next tab. (d) "Misc" tab: These options are burning performance options (or rather, options to prevent buffer overruns and things like that). The default settings seems to be fine, and most DVD burners have overrun protection these days already. (Screen Shot Below) 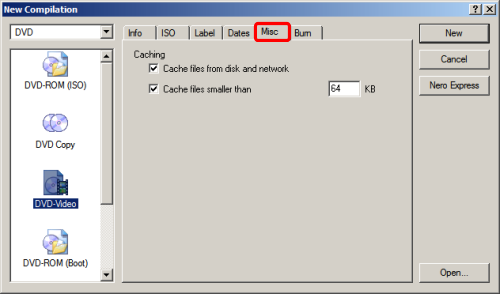 (e) "Burn" tab: "Determine maximum speed" and "Simulation" are usually not required, unless you are using a particular drive/media for the first time and you are unsure about the write speed. If you have a blank media already inserted into your drive, then the "Write Speed" should list the maximum write speed of the media. Sometimes the listed speed is actually higher than the rated speed (the speed listed on the media/media packaging), and while you can select and burn the disc above the rated speed, it is not recommended (you might get read errors when accessing the burned disc). In general, burn at the rated speed or lower if you have time. There are also some other options like if you wish to burn more than one copy, or to run a virus check before burning (not too many DVD Video viruses though). (Screen Shot Below)  7. After configuring the tabs, click the "New" button in the upper right hand side of the "New Compilation" window. (Screen Shot Below)
 8. After clicking the "New" button, your screen should look like this: (Screen Shot Below) 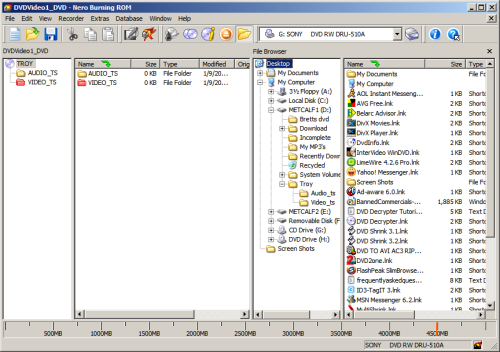 9. Now, you will want to navigate to your DVD file/s. To do that, in the "File Browser" sub window in the Nero window, click the appropriate folder containing your files. (I am doing the movie Troy, so I will go to the folder DVD Shrink created named "Troy".) (Screen Shot Below) 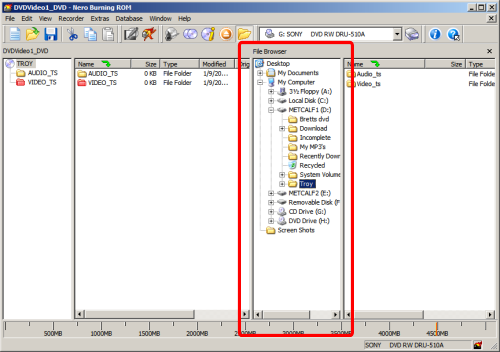 10. Once you find the correct folder, double click it while in the "File Browser" sub window, then it should reveal 2 sub folders by the names of "Audio_ts" and "Video_ts" or whatever folder you put your files in. (Screen Shot Below) 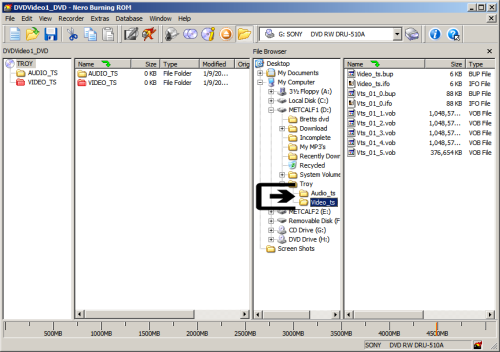 11. Now click the "Video_ts" folder, and in the sub window to the right of the "File Browser" sub window, the DVD files should appear. (Either a bunch of .vob, .bup, .ifo files or a single .iso file .) (Screen Shot Below)
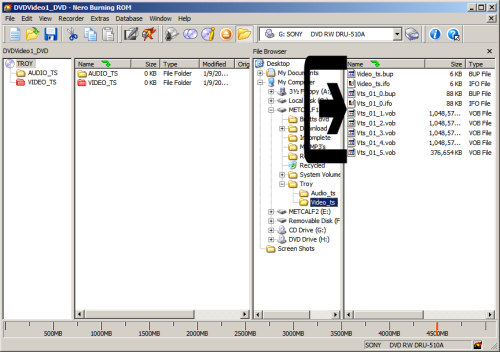 12. Now, right click the first file that is listed, and left click "Select All". (They should all be highlighted after you left click "Select All") (Screen Shot Below) 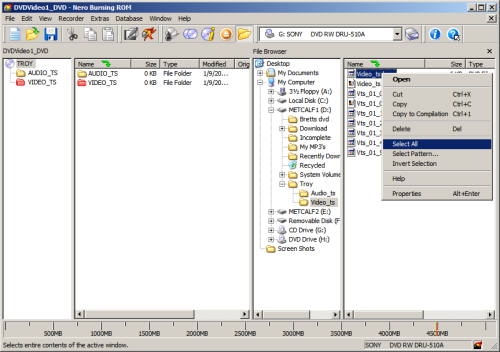 13. Now, right click again "ON" the highlighted files, and left click on "Copy". You HAVE to right click on the highlighted files, other wise it will deselect them. (Screen Shot Below) 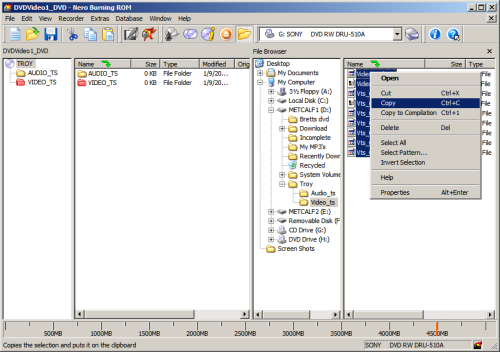 14. Now, on the left hand side of the Nero screen, there should be a "AUDIO_TS" & "VIDEO_TS" folder.(There will be 2 different sets of them) (Screen Shot Below) 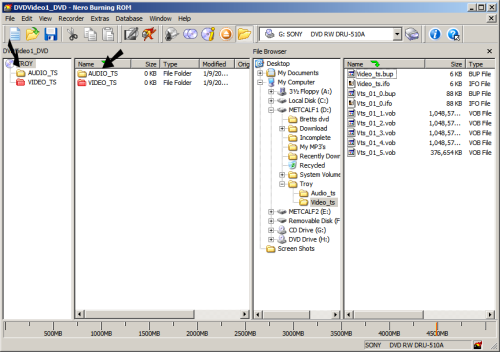 15. Right click on the RED "VIDEO_TS" folder, and then left click "Open". (You may right click either of the 2 RED "VIDEO_TS folders. As of right now, the "VIDEO_TS" folder is empty, so it will show nothing after you right click and click open.) (Screen Shot Below)
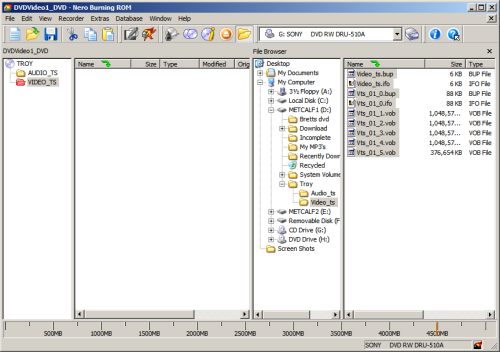 16. Now right click the RED "VIDEO_TS" folder on the far left side, under the disc Name(Label) and under the"AUDIO_TS" folder. And left click "Paste". The files should now appear in the RED "VIDEO_TS" folder. The capacity meter should also turn all blue and stop right before "4500MB". (Screen Shot Below) 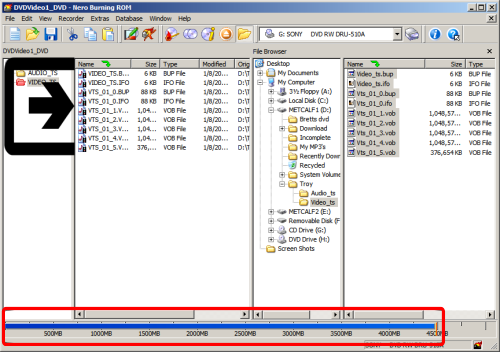 17. Now your ready to burn. Click the burn icon. (The 9th icon from the left on my version). (Screen Shot Below) 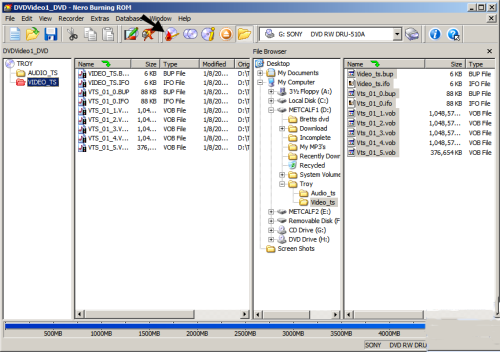 18. After click the "Burn" icon, the "Burn Compilation" window will pop up. This screen is the same screen as the "New Compilation" window, just with updated information regarding your Compilation. The only tab on the "Burn Compilation" screen I would mess with, is the last tab, which is the "Burn" tab. Now the settings you change here, are totally up to you. By no means do I suggest any different than my settings or the same as my settings. Find one that is comfortable to you, and stick with it. Click the burn button when you are ready to burn. (Screen Shot Below) 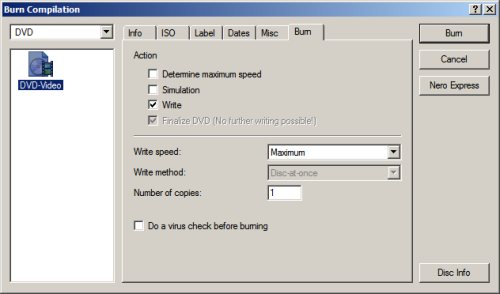 19, DONE!!! (Screen Shot Below) 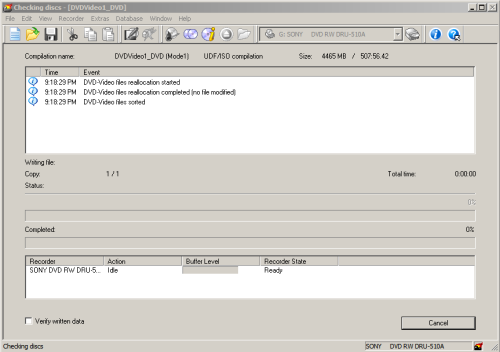 |