Using TMPGEnc DVD Author (TDA) - How to Create/Author a DVDOriginal Page URL: https://www.dvdr-digest.com/articles/41_1.htmlAuthor/Publisher: jmet Date Added: Dec 23, 2005 Date Updated: Dec 23, 2005
Below I will show you how to author/create a DVD using TMPGEnc DVD Author (TDA) that will play in any DVD player. It will have all of the necessary files (.bup, .ifo, and .vob files) needed for your DVD player to play it.
NOTE 1: New versions of this guide for TDA 3.0 has been released, both for DVD Authoring and the new DivX Authoring functionality. NOTE 2: a printer-friendly zipped .pdf document of this guide can be found here Credit photo angel2004 Software you will need: Start up TDA, on the main screen click the "Create new project" button (red). (Screen Shot Below) 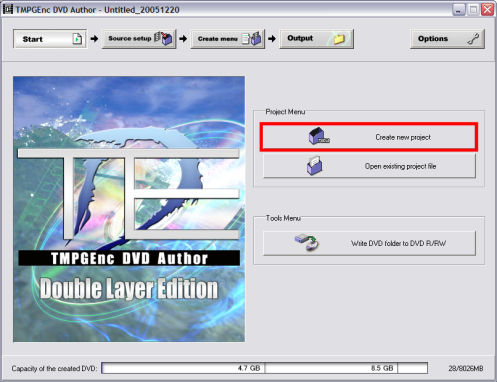 After clicking "Create new project" button, this screen will come up. Go ahead and click the "Add File" button (red), then load the MPEG-2 file you have or the one you made with TMPGEnc in this guide) (blue). (Screen Shot Below) 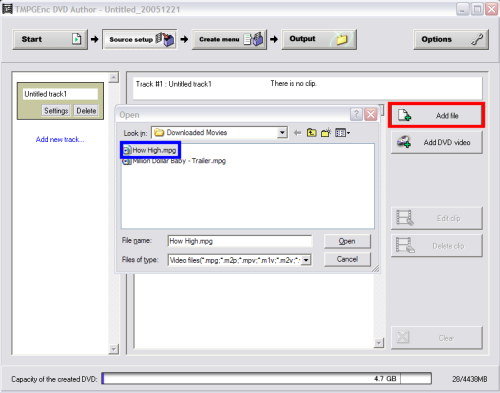
After TDA loads the file you selected, this screen will come up. There are 2 buttons at the top. Go ahead and click the "Chapter cut edit" button (red). (Screen Shot Below)
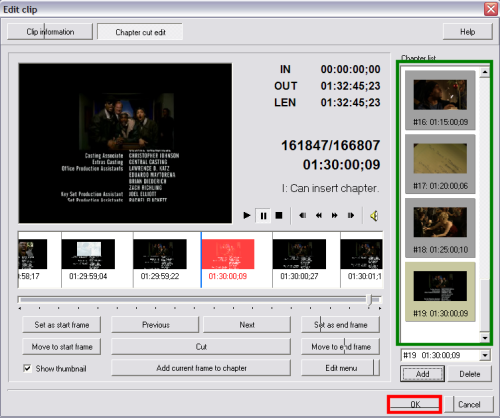
 Now this screen will pop up, here you will be able to create "chapters" so that you may conveniently skip to a scene of your preference. Go ahead and click the "Add" button. 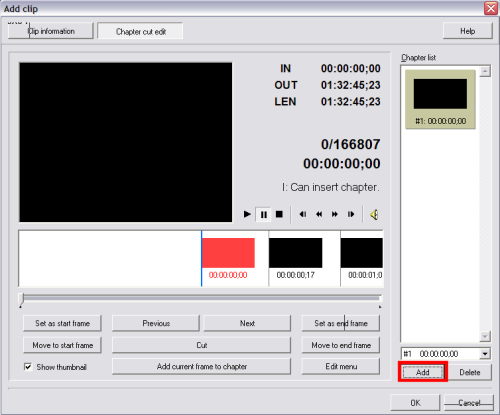 After clicking the "Add" button, this screen will pop up. It gives you 3 options to choose from.
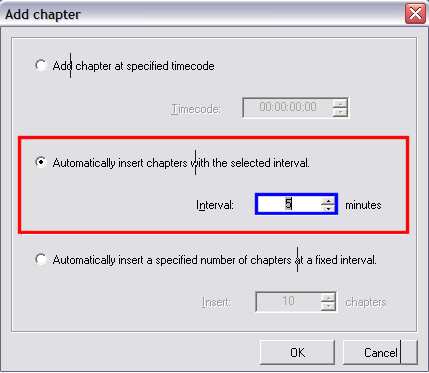
After TDA finishes adding the chapters for you (green), click the "OK" button (red) and then it will return back to the main TDA screen. Here you need to click the "Create menu" button at the top (blue).
  After clicking the "Create menu" button at the top, this screen will come up allowing you to fully customize the way the menu looks and functions. There is really far to much to explain here at this section so I recommend you just play around with it until you get the hang of what button does what, etc. I will give you a few quick tips on where to change stuff.
Note: You will have to modify each page of the menu, if you have alot of chapters, you will have several pages of menu. Editing them by clicking the "Next" button (black) (Screen Shot Below) 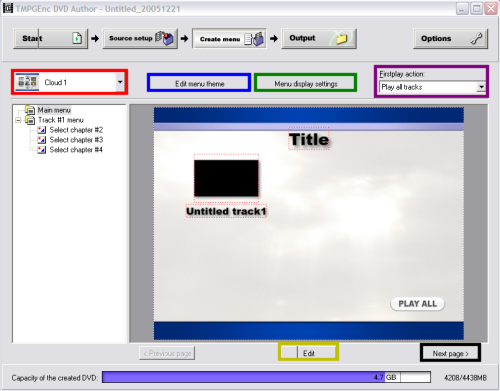
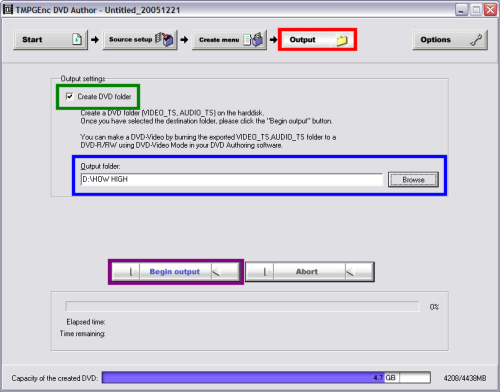
After you have fine tuned the Menu the way you like it, go ahead and click the "Output" button (red) at the top. On this screen you can set the output directory (where you want the file to be saved at) (blue). You can also tell TDA to create a "VIDEO_TS" folder and put all the files in it so that it will be more DVD compliant, although some programs like Nero already make a "VIDEO_TS" folder for you (green). When you are ready, click the "Begin Output" (purple) (Screen Shot Below)
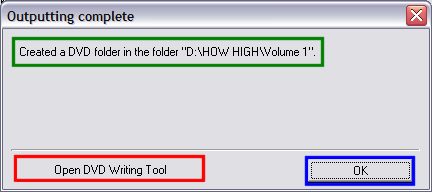
 After you click the "Begin Output" button, TDA will now start to convert the MPEG-2 file to compliant DVD structure (.BUP, .IFO, .VOB files) and give you the "estimated" time of completion, as well as the "Elapsed Time (how long its taken so far)" (red). At the bottom it gives you the final overall size of the DVD. As long as you do not go past the 4.7GB standard line, you will be able to burn right after it finishes. If it is past the 4.7GB standard line, don't worry! Just use DVD Shrink or similar, to compress the video size down (blue). 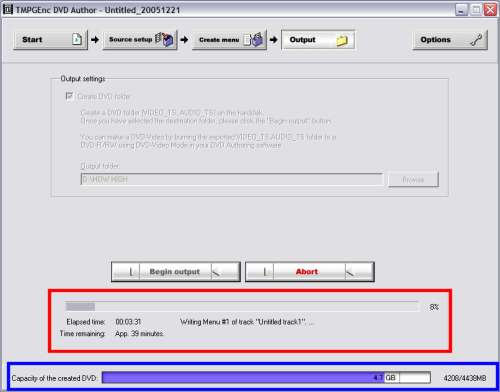 When TDA completes, this screen will pop up. You have two options (1 option if your OS is not Windows 2000 or XP).
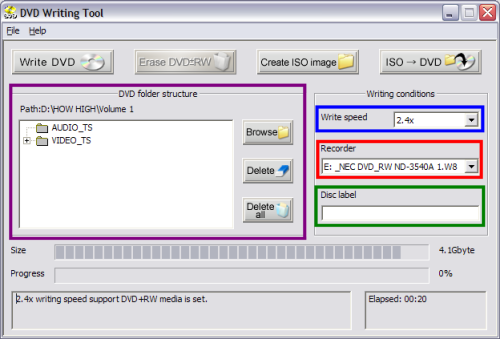
If you chose "Open DVD Writing Tool" then this screen would come up. Here you would tell TDA which drive to burn to (red), at what speed to burn it at (blue), the disc label (name) you want it to have (green), what files you want it to burn (pick them via the "Browse" button) (purple).
 There are also 4 different buttons at the top. Each ones serves a different purpose. The first and last button basically do the same thing, burn the DVD. Only difference is the first one burns "Files" (VIDEO_TS Folder) (red) and the other burns "ISO" images (blue). The other 2 buttons are pretty self explanatory, one erases RW disc's (green) the other creates a "ISO" image (purple) of the "VIDEO_TS" folder. 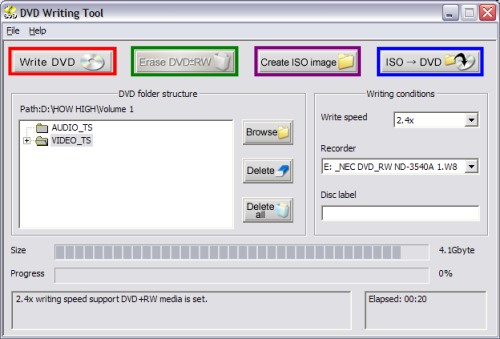 After pressing 1 of the 2 burn icons, this screen will pop up and let you know what kind of media you are burning to and what speed you want to burn it at. If the settings are correct, click OK. If they are not, click Cancel and go back and fix them. (Screen Shot Below)  After clicking OK, just wait for it to finish! DONE! (Screen Shot Below) 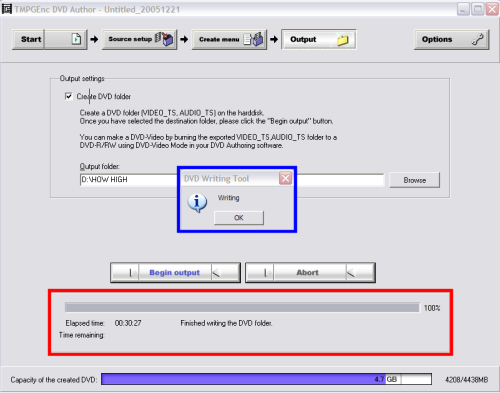 |