Page 3 of 3: AVI and Other Video Files to iPod Video
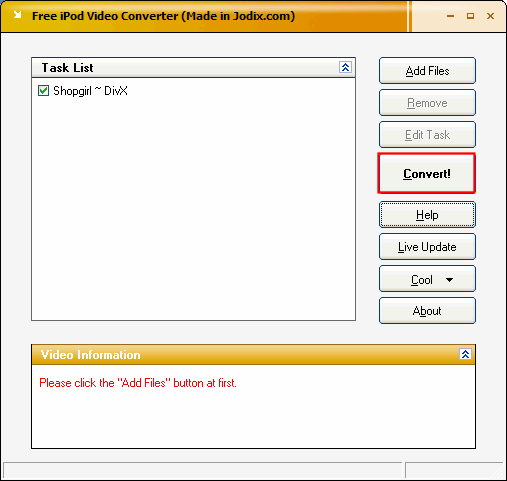
After clicking the "OK" button, it will return you back to the main screen. Only thing to do now is click the "Convert" button (red).

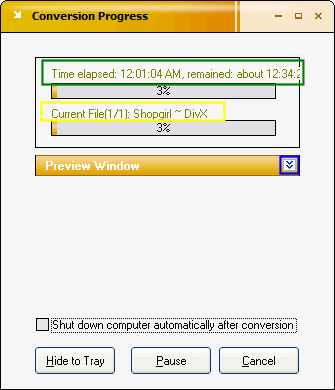
The "Conversion Progress" screen will come up. Here it will show you how much time has elapsed or gone by and how much time is remaining (green). It will also tell you what file its working on if you loaded multiple video files (yellow). **TIP: If you turn off the "Preview" screen, it will go faster. Just click the "double up arrows" button to turn it off (blue).** [Screen Shot Below]

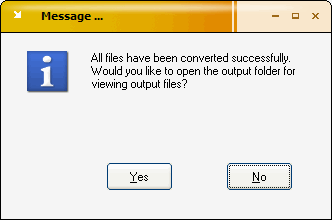
When its finished, this screen will come up. Either click "Yes" or "No". Click yes if you want it to automatically open up the folder containing the .mp4 file you created or click no if you don't. [Screen Shot Below]

Your Done! All you need to do now is transfer it to your iPod.

The "Conversion Progress" screen will come up. Here it will show you how much time has elapsed or gone by and how much time is remaining (green). It will also tell you what file its working on if you loaded multiple video files (yellow). **TIP: If you turn off the "Preview" screen, it will go faster. Just click the "double up arrows" button to turn it off (blue).** [Screen Shot Below]

When its finished, this screen will come up. Either click "Yes" or "No". Click yes if you want it to automatically open up the folder containing the .mp4 file you created or click no if you don't. [Screen Shot Below]

Your Done! All you need to do now is transfer it to your iPod.


