Page 3 of 6: Using NeroVision Express - Making a DVD with Menus
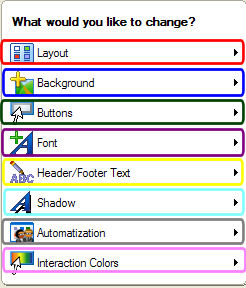
This screen is totally designated to the appearance and physical layout of the menus. It allows you to:
1. Change where items are on the menu and how many items there are per menu screen (red).
2. The picture you want displayed as the background image (blue).
3. Select the way the buttons look (green).
4. What kind of font you want displayed for your text (purple).
5. The text you want displayed at the top and bottom of the menu (yellow).
6. You can set the properties of shadows or turn them off completely (light blue).
7. Set how you want the menu to function (grey).
8. Set what color is show when you highlight a item and what color is shown when you select a item (pink).
(Screen Shot Below)


